Sorry for the radio silence. If you’re wondering what could possibly keep me from posting, I’ll give you a couple of scenarios and let you pick.
1) Maybe I was abducted by a local drug lord and imprisoned in a room without outside contact. Maybe then I was held for a week or two until the daughter of said drug lord stumbled into the room by accident, immediately fell in love with me, and she convinced the drug lord to release me.
2) Or maybe I was just neck-deep in boat projects, treading water, and didn’t have the time or mental energy to post.
Pick one of the above, whichever floats your proverbial boat. Whichever option you choose, I did manage to get some work done on S/V NOMAD. Quite a bit, really. It’s amazing what you can accomplish when you have a buddy who has been refitting boats for 30 years, some cheap labor, you’re not drinking, and you’re working from dawn to after dark. It hasn’t been cheap, it hasn’t been fun, but it has been productive.
Lagoon 380 Improvements
There were two major accomplishments over this week and a ton before. One was metalwork, the other was cleaning diesel tanks. I’ll go back and list the other work that I’ve had done shortly. But I wanted to answer a couple of emails/questions about the recent metalwork. Two things prompted this metalwork – an attempt to use the unused space on the rear of NOMAD, and the need to lift my larger/longer dinghy without getting caught on the interior of my hulls as I raised it. With that in mind, here are some pictures.
Lagoon 380 Rear Solar Arch
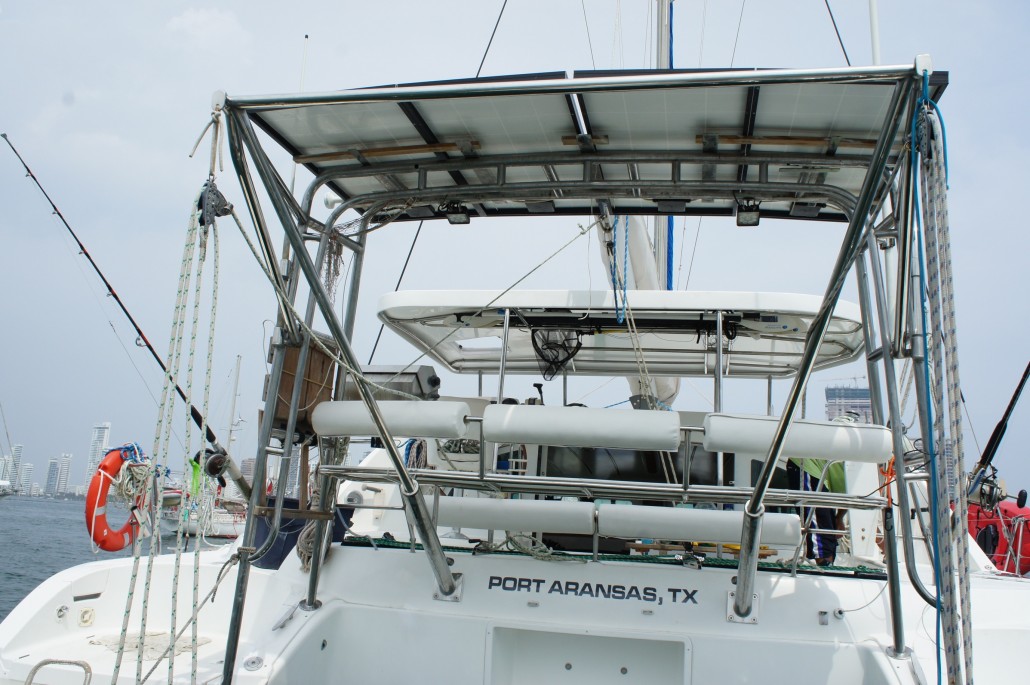
I’m gonna start with the arch, because I’ve been threatening to do a little write-up on it to answer some previous questions. The arch is super, super handy. It’s the bees-knees for unshaded solar production, which is it’s main purpose. It has all of my antennas, it has my dinghy engine lift, it has my LED work lights on it. It has my fish-cleaning table, and it has a couple of fishing-rod holders that allow me to troll a nice spread.
The arch spans the inside of my two hulls and is slightly higher than my bimini-hardtop. It’s attached to my hulls at four points, two on each hull – which slope downward. It was very stable, even when we hung on it or swung from it. Now it is much, much stronger as we’ve tied it into the old davit system and the rear-seating. Here’s a rear view, with some fancy arrows.
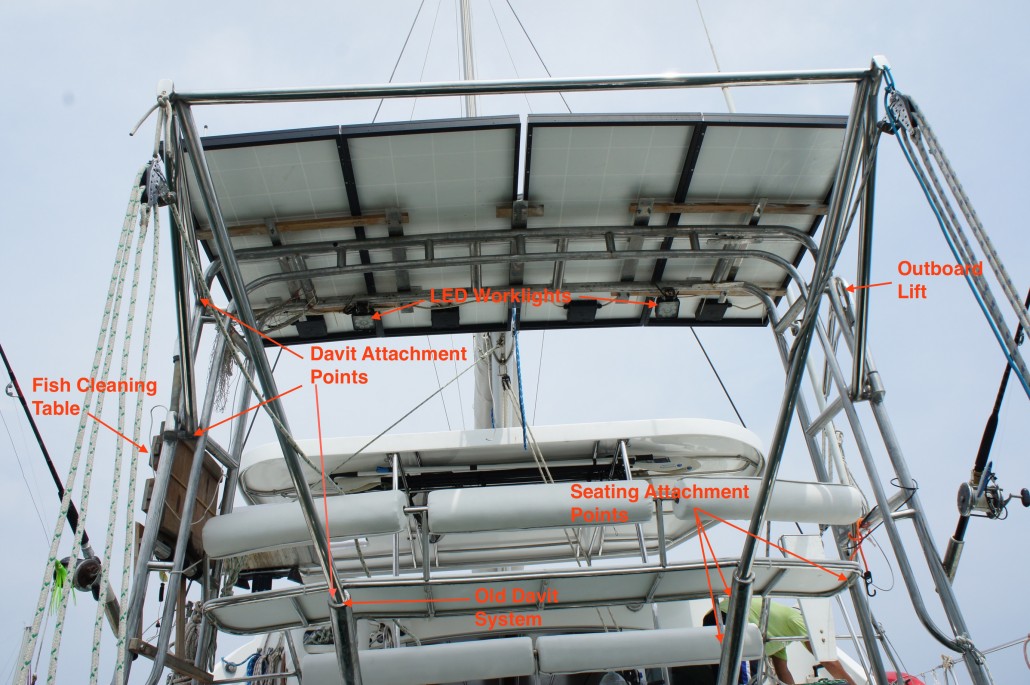
Lagoon 380 Rear Arch View
Lagoon 380 Arch Attachments
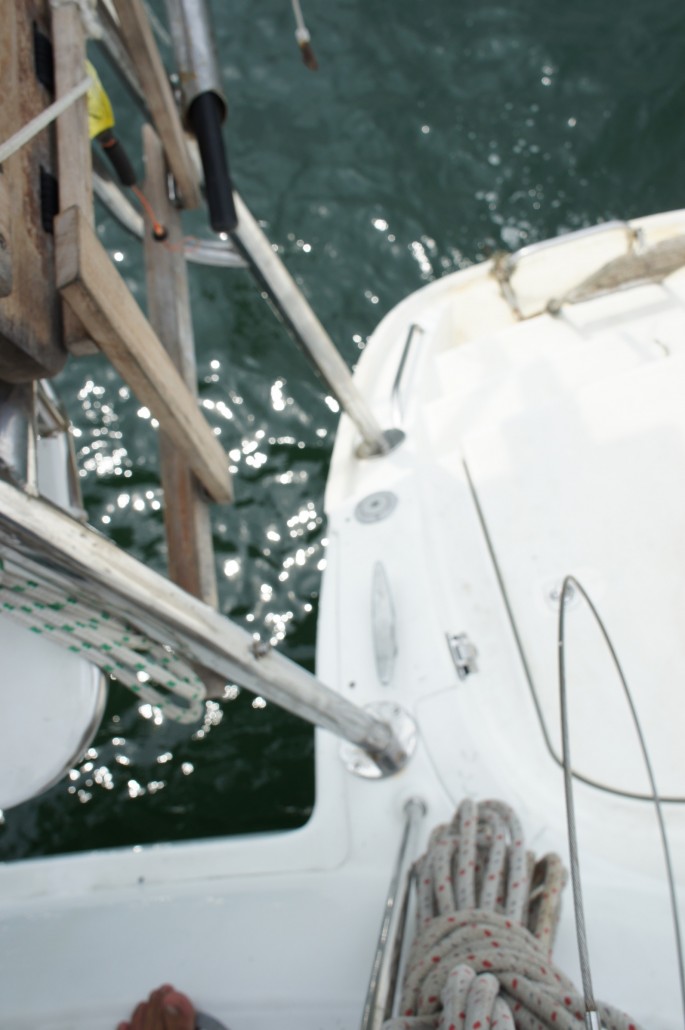
The dinghy engine lift is a handy contraption that I use very frequently, it’s attached to the upper part of the arch on my starboard side. It makes removing the outboard a one-person job and I don’t have to stress about dropping my outboard in the water. That’s a real concern in a rocky anchorage, shorthanded. And I love my outboard, so I’d likely be pretty unhappy if it went swimming. The lift swings out, I drop the block and tackle and then raise it and drop the outboard on the outboard holder-thing (the white piece of starboard).

Dinghy Engine LIft
Then there’s the fish-cleaning table, which is attached about belly-height on the portside of my arch. It folds out and is really solid – solid enough that I often attach a vise to it when I’m working. People have used it as a diving board, but that’s dumb. It’s in rough shape now as we’ve been working on other things and not worrying much about cosmetics. Check it.
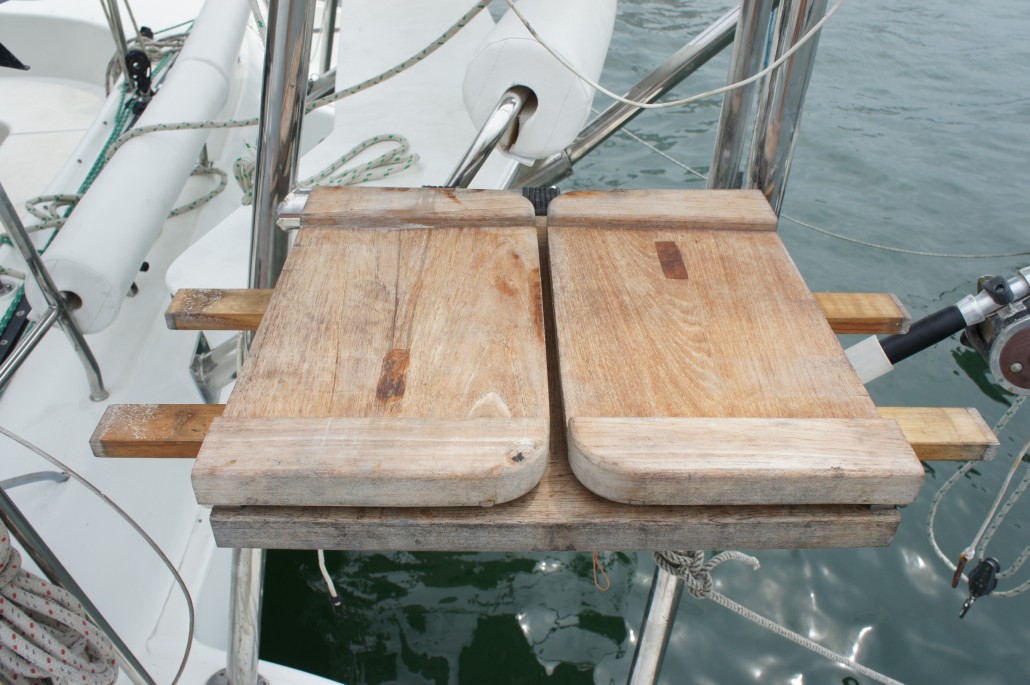
Folding Fish Cleaning Table
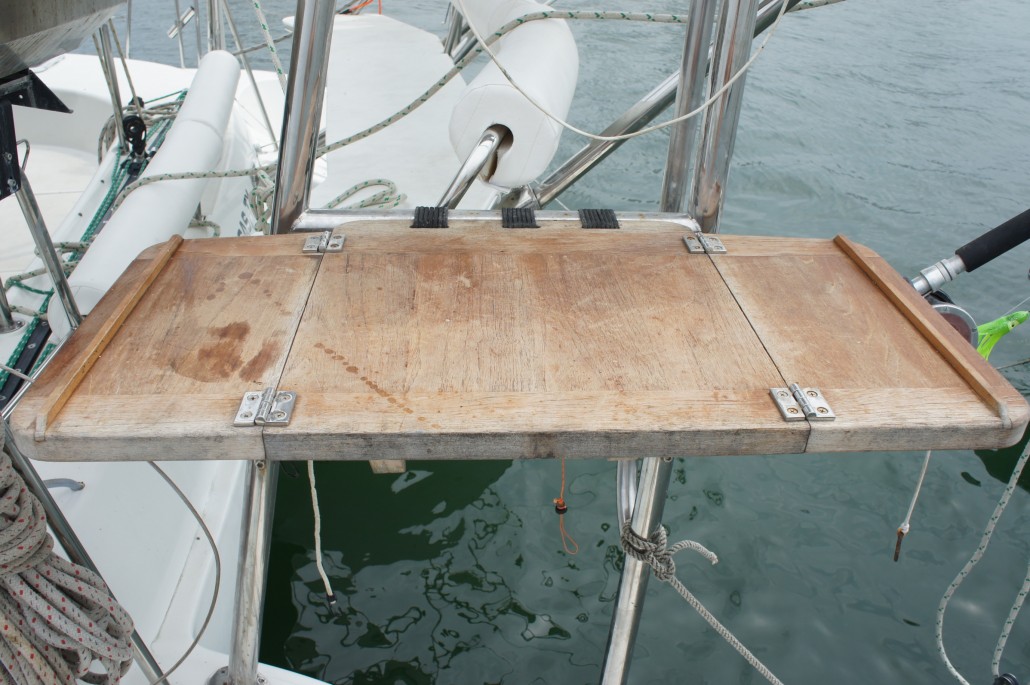
Fish Cleaning Table Foldout
Lagoon 380 Rear Seating
Moving on, the rear seating. If anyone actually wants measurements, I can make that happen. Just lemme know. The first thing we did was remove the upper and lower lifelines off of the rear. The we moved the lower lifeline down a bit and made it a single stainless tube. Next, we decided on the height of the seating platform (also stainless tubing) and then figured out how to tie it all in. The goal was to tie the seating platform to the arch and the old davit system. We accomplished this, and I have to say I really like it. The seat is Starboard, which is a PITA to work with, but is solid and great in a marine environment. Finally we added cushions for both the lower lifelines and backrest of the seat, which in effect gives me two seating platforms with cushioned backrests.
Lagoon 380 Seating Rearview
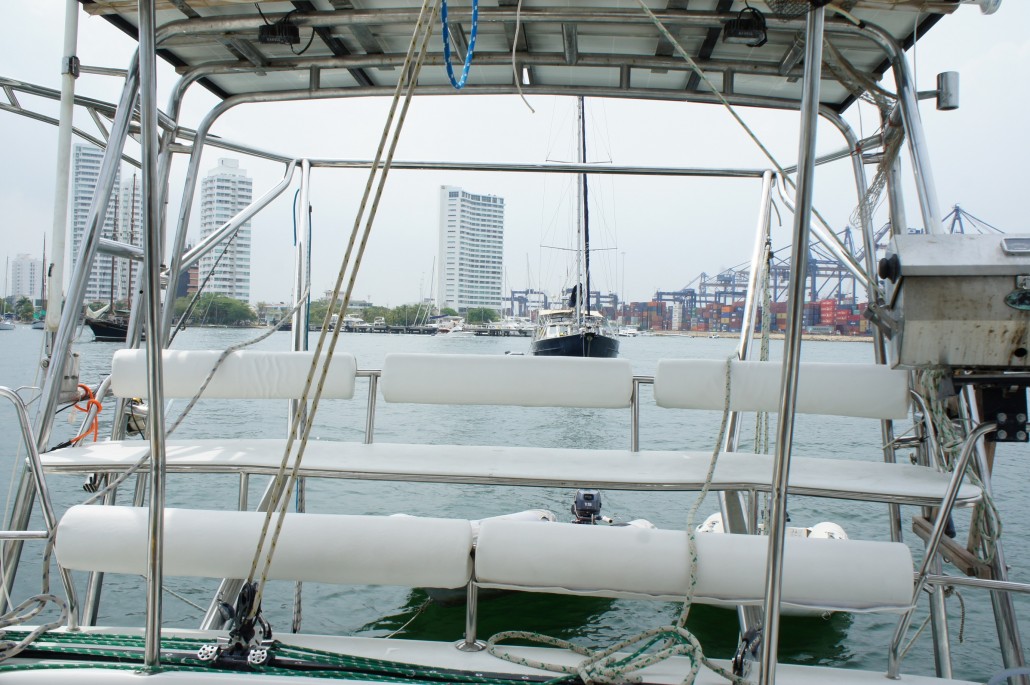
Lagoon 380 rear seating
Old davits, new seating attachment
I would change two things about this design – I would slope the seat upward as it goes forward to create a natural incline keep everyone in the back of the seat. I would also hang the Starboard over the metal tubing on the bottom of the seat about two inches, giving a bit more seating surface area.
Lagoon 380 Davit System
The davits that come with the Lagoon 380 are, in my opinion, sub-par. They aren’t as strong as they could be, and they leave the dinghy relatively low over the water. To be fair, they do work – they just don’t work as well as they could. In addition, because of the way they hang between the hulls, you’re restricted in dinghy-length to what can fit between the hulls.
I fixed these problems with the new davits, but I didn’t tackle this project by choice. I tackled it after finding my new dinghy a little too long for the previous davit system. A matter of an inch or two.
The new system is better, stronger, higher, and it extends far enough over the rear of NOMAD that the dinghy does not come up between the hulls. That, in turn, allows you to put whatever length dinghy you want on the davits. Winning.
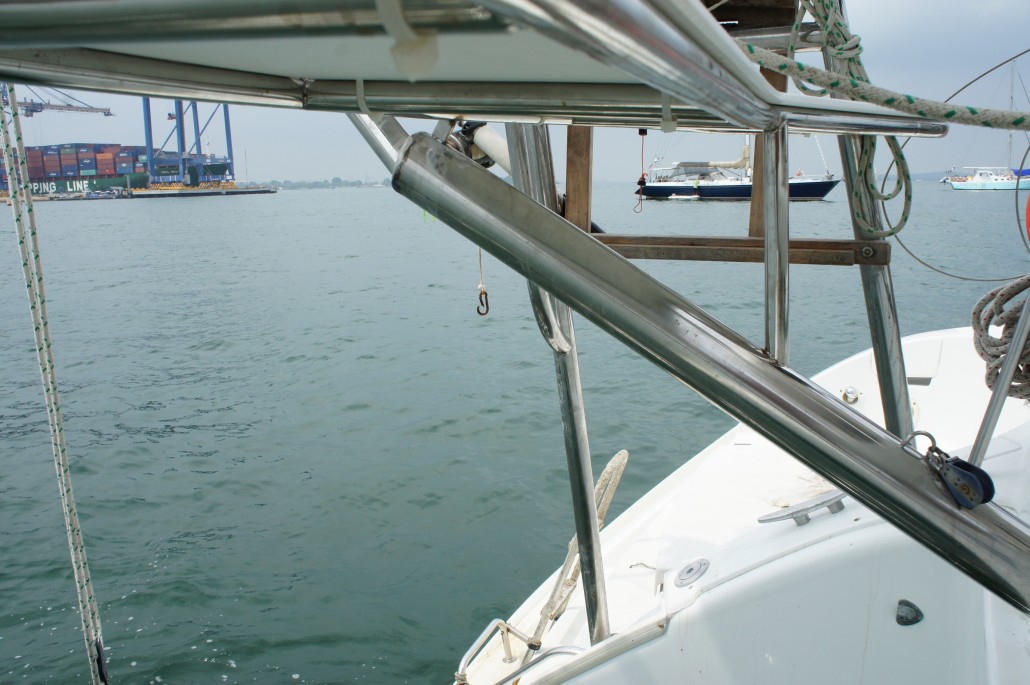
Again, the goal here was to tie the davit system into the existing stainless structures to make them all stronger. We succeeded. Of course it needed to be very, very strong as it is inevitable that I’ll end up smashing through rough seas with the dinghy on these davits…
Triangles are very strong shapes. We used them effectively to stabilize the davits both up and down, and left and right. Even when the dinghy (with the outboard on it) is swinging back and forth on the davits, it creates no movement on the davits themselves. In fact, you can now stand in the dinghy – a thing I wouldn’t have dared to do with the old system.
There are three main supports on each side of the davit system, and a top bar between each side. The long bar that extends at an angle downward actually connects to the remnants of my old davit system. It provides vertical and horizontal stabilization and is the thing that really tied the whole system together. Here’s a repeat pic, but it helps.
Lagoon 380 Seating Rearview
The only issue that I have with this system now is that I have to raise the dinghy very high, and tie it down very well to keep it from rocking when we catch a beam wave. This is more an issue of me being a bit lazy than it is a design flaw. All-in-all, I think the metalwork is done. And done well. Overall I can think of no downside, except that it wasn’t cheap and that it added weight. Alas, everything is a compromise. There are two things I would improve aesthetically too, but that’s for a later date.
Lagoon 380 Fuel Tank Inspection Port
In the next post I’ll outline all of the work I’ve done on the engines. Let me just say – they’re completely overhauled and are, in many ways, as good as new. They crank up, cold, without even making a complete revolution. For older diesel engines, this is great.
BUT
I kept having problems. With fuel. Over the last few months I’ve flushed the tanks twice, but it didn’t seem to make a difference. Every once in a while, usually when I’m pulling into a crowded anchorage, I’d lose an engine due to a clog in the fuel lines. My fuel filters were fine, and I have an additional electric fuel pump that helps move plenty of fuel – so it was a matter of fairly large crud blocking my intake lines (inside my tanks).
There are two fixes for this: 1) flush the tanks again and hope for the best 2) pull the tanks out, cut them open, clean them, and then weld an inspection port on the top of them so I can clean them and never, ever have to remove them again.
Being of the mindset that I would rather do things once and do them right, I chose what was behind door number two. This presented plenty of problems and some additional expense, but it was the right decision – of that I am completely sure.
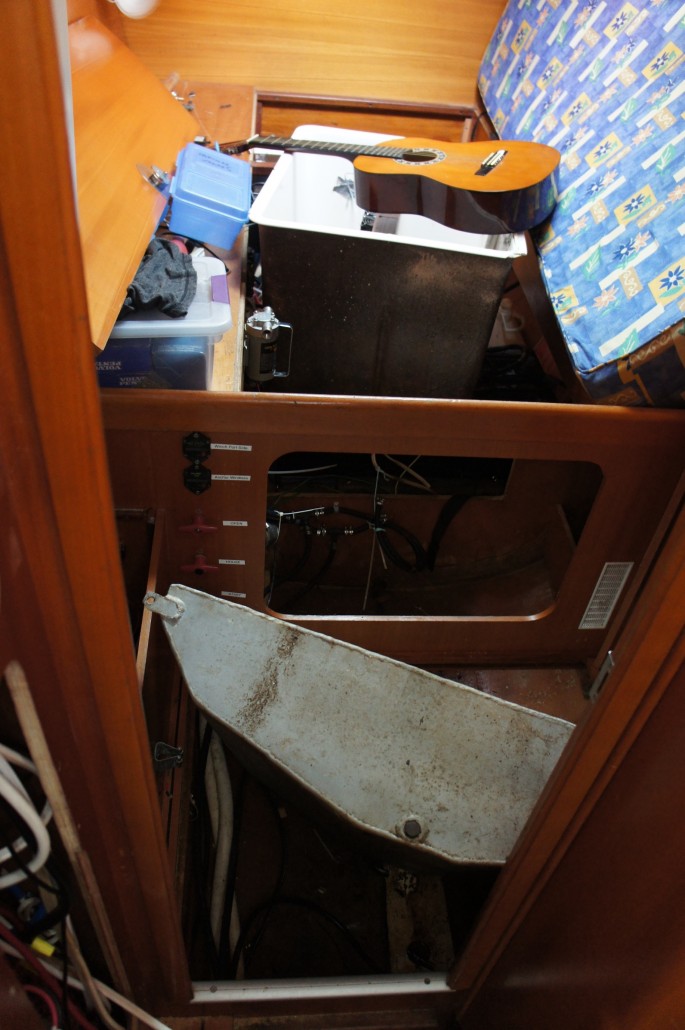
The first step was getting the fuel out of the tanks. This isn’t fun, but we did it with a small 12V pump. Then we had to get the damn tanks out. Lagoon did an excellent job here, they made it very simple (compared to almost any other boat) to remove the fuel tanks. We had only to disconnect some hoses, remove a door and some paneling, and then do some angle-magic with the tanks to remove them. That is, though, where I stop giving Lagoon credit on the fuel tanks.
Lagoon 380 Fuel Tank Removal
ALL MARINE FUEL TANKS SHOULD HAVE (LARGE) INSPECTION PORTS. That’s a fact. I can’t understand, for the life of me, why anyone would make a marine fuel tank without a large inspection port allowing the user to see and clean the inside of the tank WITHOUT REMOVING THE FUEL TANKS.
Anyways.
We pulled the tanks and cleaned up the area around/under them.
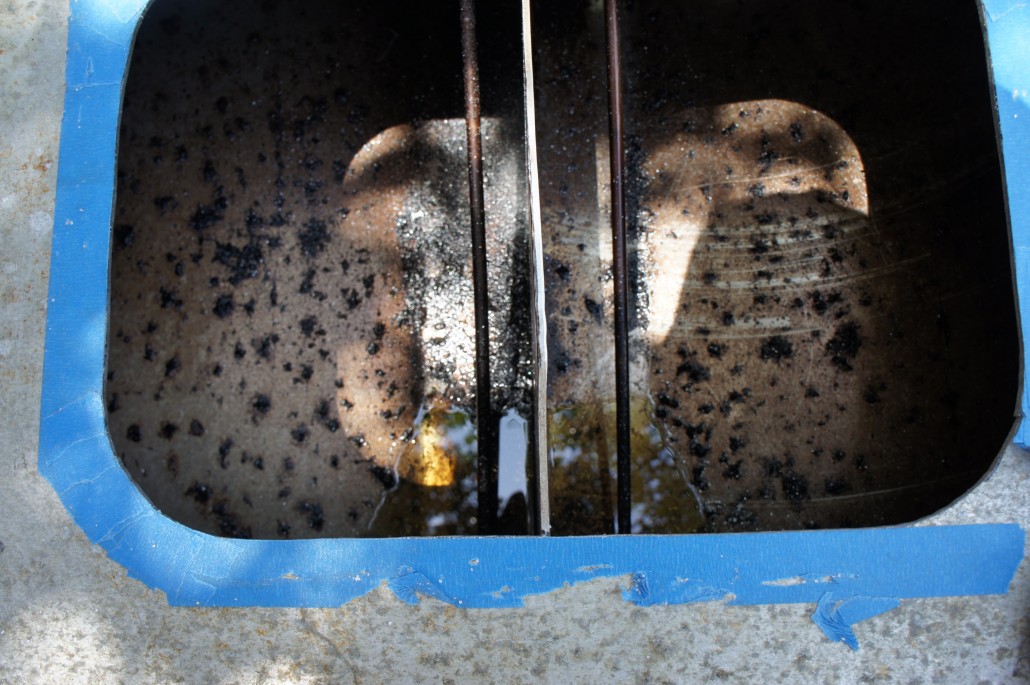
Then the fun started. I needed to find the baffles (divisions in the tanks that keep the fuel from sloshing when you’re bouncing around at sea), and then center a large cutout over the baffle(s). Come to find out there is only one baffle in the tank, which is almost centered. I then needed to decide how large the cutout would need to be.
Of note here – you shouldn’t create any kind of inspection port with corners on it. Sharp corners are a point of failure and a point where the tanks will leak. A 2” radius corner is the minimum. So I created a template from some stiff paper, then centered it on the baffles on the tanks, then outlined it with a marker.
Then I taped the line I needed to cut with blue masking tape. This is almost mandatory for an amateur (like me) to keep straight lines. With this complete I drilled a hole near the line, and started cutting with a jigsaw. I broke one blade very quickly, but managed to do all of the other cutting without breaking another blade.

Lagoon 380 Fuel Tank Inspection Port
With the first tank cut open, I was very happy I made the decision to do this. Here’s what the inside of your diesel tanks should never look like. Incidentally, this is also what the inside of my diesel tanks looked like. Not cool and not my fault – but definitely my problem. 15 years of abuse led to this.
Lagoon 380 Fuel Tank Cutout
Anyways.
The next step is filing down the sides of the cutout so you don’t have to take a trip to the emergency room after cleaning the tanks. Next, we washed, scrubbed, and sanded the inside of the tanks until they shone. We literally polished them. It was nasty work that hurt one’s back, but we did it and did it well.
Then, with both tanks out, with both cutouts complete, and with both of them clean, we designed the inspection port. The top plate of the inspection port needed to screw down tightly, with a gasket to prevent leaking. That means we needed to weld a lip on the tank itself, then drill and tap some holes in said lip, then find and cut the gasket, etc.
Since I had plenty to do and I haven’t learned welding yet – I farmed this out. My welding guy is good. Really good. And though not cheap, he’s remarkably fair in his prices. Compared to anybody in The States – he is a bargain. I felt confident in his abilities so I sent the tanks home with him when he was done with my davit system.
He screwed the pooch on this one though. I guess you can’t expect perfection, but this was a disappointment.
I got the tanks back a little later than planned, that matters because I’m paying to keep the boat at a marina that I hate, staying on a friend’s boat, and my boat isn’t secure at this spot. But we got the tanks back.
When I got them back, I clearly asked if they had been cleaned inside. I was told they had. I asked the gent to open the inspection ports and show me. This is where everything went to shit. We used aluminum screws to prevent galvanic corrosion (something I’ll never do again, rather I’ll use stainless screws and coat them with a compound that prevents galvanic corrosion). The aluminum screws began falling apart. Before we had both tanks open we had four screws that were completely unusable.
The issue wasn’t really the screws though. The issue was the crappy job of drilling/tapping the top plate, the gasket, and the tanks. The holes just weren’t aligned. I called the welder, I wasn’t happy. He apologized and told me he was rushing to get them to me on time.
I was pissed, but that wasn’t helping so I settled in to the tedious task of retapping 40 different holes in the tanks. Of course, I’d never tapped a hole – but trial-by-fire has always worked for me and this was no exception. Then, of course, the tanks weren’t clean on the inside – so we cleaned them again. Then we had to install them. I had crew coming in the next day, so there was schedule pressure – but we got it done before 9PM, at which point we ate and immediately fell asleep.
The finished product wasn’t pretty, but it is very sturdy and very functional. The tanks can now be inspected, cleaned, and re-sealed all by removing a single floor panel (and the inspection port). In the future, this will be a quick job. Truthfully, though, I doubt I will have to clean the tanks again – I’m religious about using a Baja filter and the tanks are very, very clean right now.

Lagoon 380Fuel Tanks w/Inspection Port
Long story short? We (me and a couple specialists) kicked ass. The boat is in better shape than it’s ever been. I’m ready for a vacation. And I promise to update more when I’m not neck-deep in boat projects and treading water.
Until then, salud.
Lagoon 380 Improvements


